WordPress CMS is compatible with your PC? One of the primary reasons for this is that you may test WordPress before putting it on the server, or you can do programming (building themes, plugins, etc.) and creation in WordPress without paying (FREE) in hosting, domain, and related services.
WordPress will be completely functional and operate like any other site if it is installed in this manner.
To save space and effort, we’ll refer to WordPress Download for PC in this article.
What is the difference between installing WordPress on Windows and server?
In essence, there is no distinction. When you install WordPress on a server (a traditional website), it is kept on a paid server. WordPress is installed on your computer when you install it through XAMPP (Bitnami).
“To access WordPress, which is installed on the server, type in the browser: www.yourwebsite.com/directory-example/
To access WordPress, which is installed on your machine, type in the browser: http://localhost:29238/directory-example/…
The most important aspect is the address. In this situation, localhost refers to your system (PC).
Related article: How to Create a Killer Web Design?
Why do you want to Install WordPress on Windows?
To Install WordPress on Windows might be for a variety of reasons, such as wanting to build your site locally offline, learning how to use WordPress, or testing certain custom features and plugins before going live on the web. For whatever reason, you’ll need a way to install WordPress locally on your machine.
Related article: Best Selling WordPress themes 2022
Open-source server environment apps
To install WordPress locally, you must first create a server environment on your computer, which you can do with two popular free and open-source server environment apps, WAMP and XAMPP (Bitnami).
Both server environment apps are fantastic, and they will both simulate the server environment required by WordPress to run on your PC. I’ll walk you through the process of installing WordPress using both solutions, but it’s entirely up to you which one you use. Let’s begin with WAMP.
Tips: Get your business online for the WordPress Website Design Company In Lahore
Download WordPress and use it on your XAMPP (Bitnami) Server.
WordPress Download Manager’s free edition provides password security, limited viewing, and support for multiple domains. The password protection package enables users to password-protect an entire bundle of data or a single file within a package. It’s a straightforward, user-friendly download manager. It’s also one of the most active WordPress download management plugins.

Option 1: Install WordPress with XAMPP
The first (and recommended) method for installing WordPress locally is to use XAMPP, which is a comparable program to WAMP. Don’t the names rhyme?! You may alternatively install WordPress using XAMPP, which is a free and open-source program.
XAMPP is an acronym that stands for cross-platform, Apache, MySQL, PHP, and Perl. We won’t be using the Perl piece because WordPress is written in PHP rather than Perl. XAMPP, like WAMP, is a mix of Apache, MySQL, and PHP. The primary distinction between WAMP and XAMPP is that XAMPP may be installed on a variety of systems, including Windows, Linux, and Mac.
Must read: Use the correct URL redirect when changing a site
Download XAMPP (Apache Friends)
Download XAMPP also has its own dedicated official website where you can get your hands on a free download of the program; simply navigate to: apachefriends.org/index.html and you will be transported to the XAMPP homepage where you can download the application.
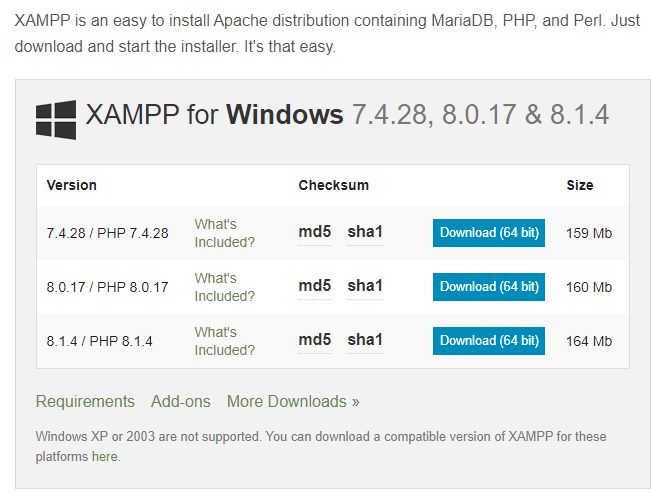
In contrast to WAMP, there is just one version for Windows. Simply click on the download for the Windows platform to be sent to the SourceForge website, where the download should begin instantly.
Read more about cPanel WordPress Hosting 2022 – FAQ’s About cPanel
Installation
The User Account Control window will ask you to confirm that you wish to enable XAMPP to make modifications to your computer. To proceed, click Yes. If you have an anti-virus application, which you should, XAMPP will warn you that it may interfere with XAMPP and provide a link where you may learn more:
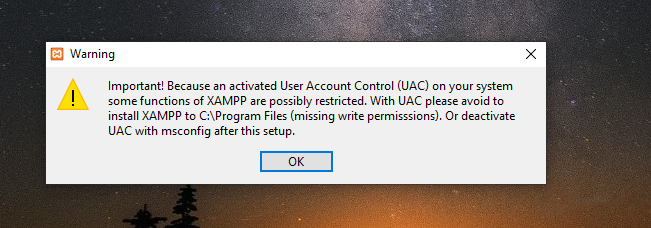
In most circumstances, the anti-virus application will have no effect on XAMPP; simply select Yes to proceed with the installation. XAMPP may subsequently provide another warning regarding the User Account Control limits, which, once again, should not be a problem.
Use Button in your website: Responsive Button CSS Style Example
The XAMPP installation procedure will launch, and multiple screens will appear before XAMPP is installed, identical to the WAMP installation:
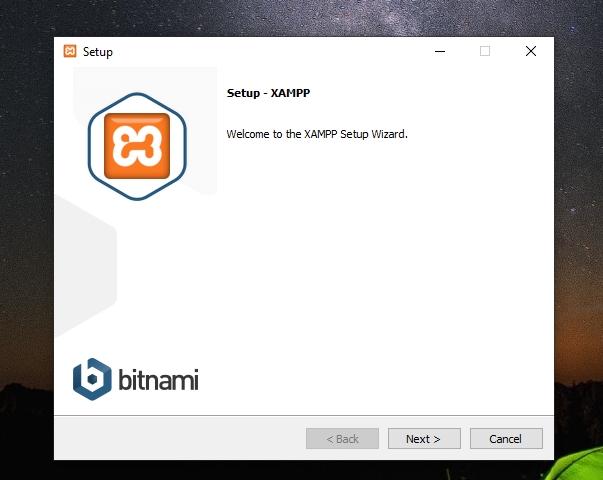
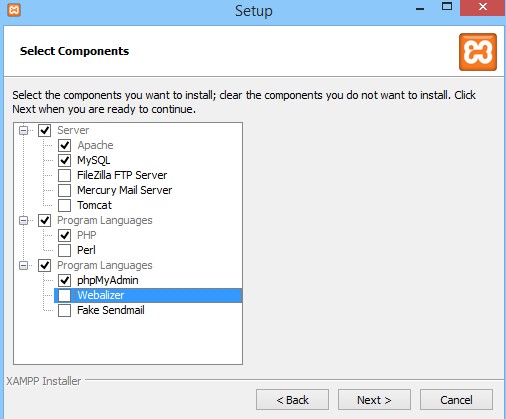
To proceed with the installation, click the next button. After that, XAMPP will ask you to confirm the components you wish to install:
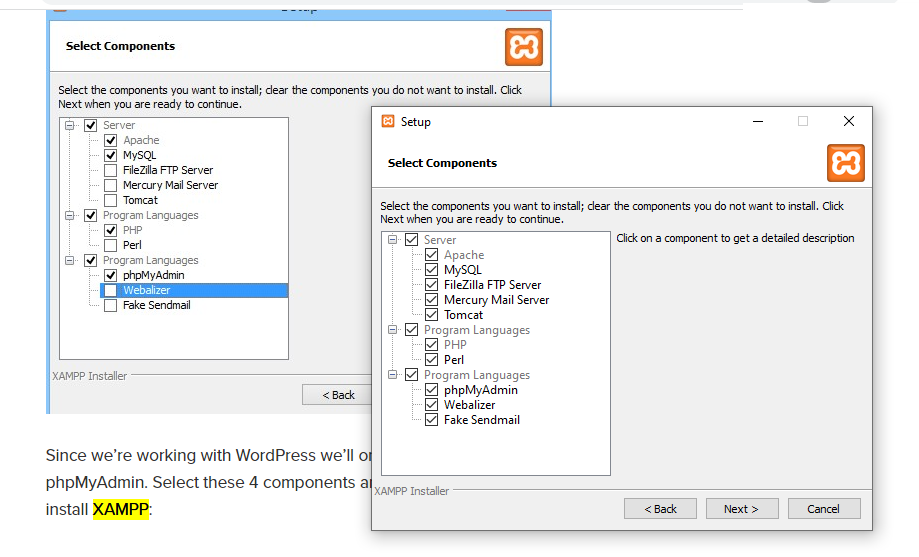
We’ll just need four components because we’re dealing with WordPress: Apache, MySQL, PHP, and phpMyAdmin. Select these four components and press the Following, you must indicate where you wish to install XAMPP:
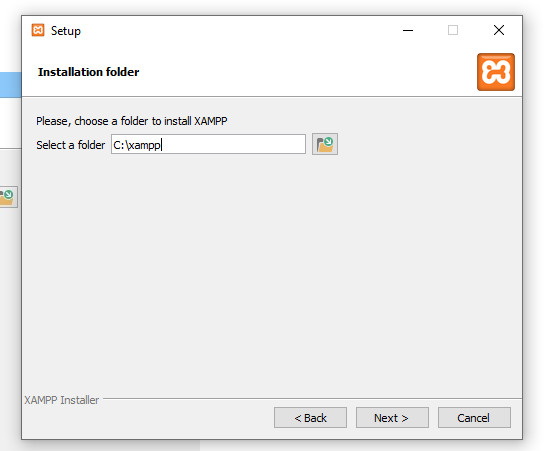
It’s better to install XAMPP at the C folder’s root, then select Next to proceed. Then, on the following screen, you’ll learn more about XAMPP’s developers. Uncheck the Learn more about Bitnami for XAMPP option and then click Next. You will then be presented with the ready to install page; click Next to proceed with the installation:
XAMPP will then begin the installation process, which may take several minutes. Now is a nice time to go get something to drink while XAMPP is installing (time-taken)!

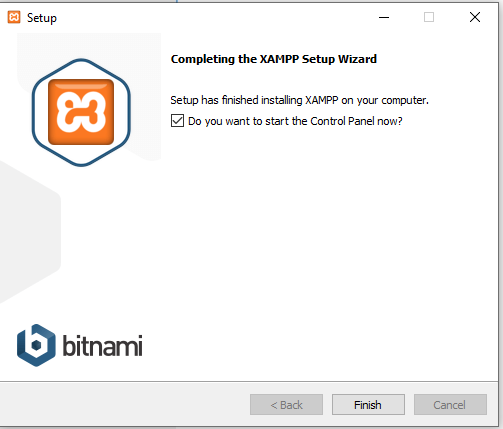
When the installation is finished, you will receive a final dialogue box with the option to activate XAMPP straight immediately. Finish by clicking the Finish button:
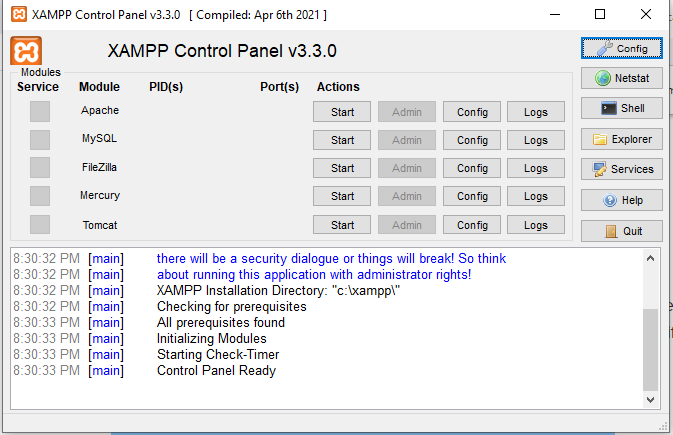
The XAMPP control panel will then be shown. You have completed the installation of XAMPP:
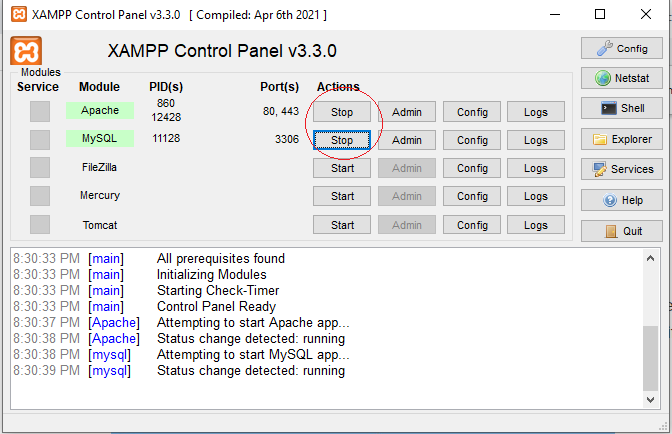
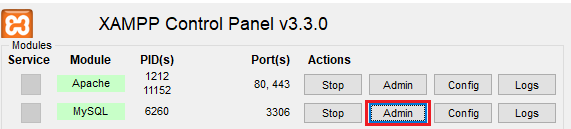
The first step is to start the Apache and MySQL services. You may do this by clicking on the Start button next to each Module, and both services should start. Please keep in mind that XAMPP will not function correctly if you also have WAMP installed since they will compete for the same ports. When all services are operational, it should look like this:
To ensure that everything is working properly and that the server is up and running, enter http://localhost into your browser and you should be sent to the XAMPP homepage:
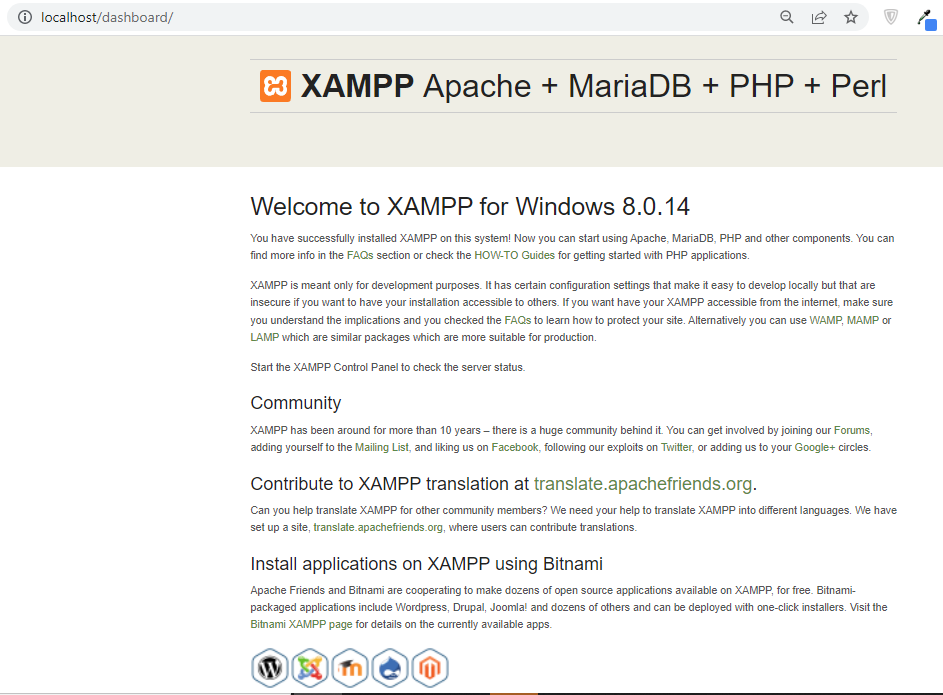
That signifies that all systems are operational and that the XAMPP installation is complete. The next step is to establish a database for WordPress. What a case of déjà vu!
Creating Database for WordPress
You will need to build a database for WordPress to utilize, just as you did with WAMP, and the procedure is fairly identical. The only change is how to open phpMyAdmin to create the database, which is as simple as pressing the Admin button next to MySQL on the XAMPP control panel:
This will send you to the phpMyAdmin user interface panel:
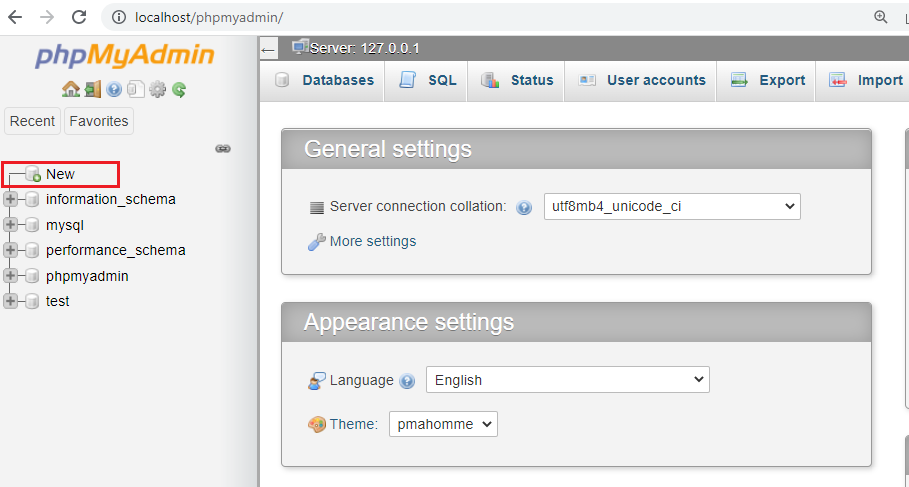
In the same way that you created a database in WAMP, click on the Databases tab, input a name for your database, and then click on the Create button:
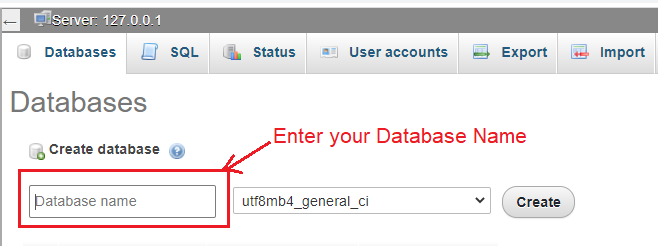
A database with the name you choose will be created; once again, I’ve named mine WordPress. Also, keep in mind that the default username is root and the password is blank. That implies we now have a database that WordPress can access; the next step is to download and install WordPress.
Bitnami WordPress Download
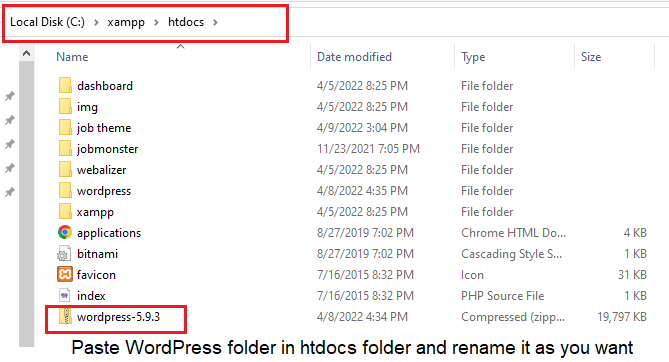
Download the most recent version of WordPress from http://Wordpress.org and save it to your PC. Once you’ve downloaded WordPress, make sure to unzip it and copy the unzipped folder to your clipboard. In XAMPP, you must insert the unzipped WordPress folder inside the htdocs folder; in my example, I installed XAMPP in the root of the C Drive, so my path will be C drive–>XAMPP–>htdocs. Here’s a diagram of the path:
Remember that the WordPress folder has two levels; for simplicity, I’m going to remove the version number from the folder name and simply keep it as WordPress, and inside this folder is another folder named WordPress. You may rename this folder if you like, or just copy its contents and paste them into the root of the htdocs folder so that you only need to write localhost/WordPress to visit the website.
To install WordPress on XAMPP, navigate to http://localhost/wordpress – notice that I don’t have a primary folder within another, so if you just pasted the original folder and changed it, navigate to http://localhost/wordpress/wordpress – or whatever you renamed the second folder too. You will be sent to the WordPress installation page:
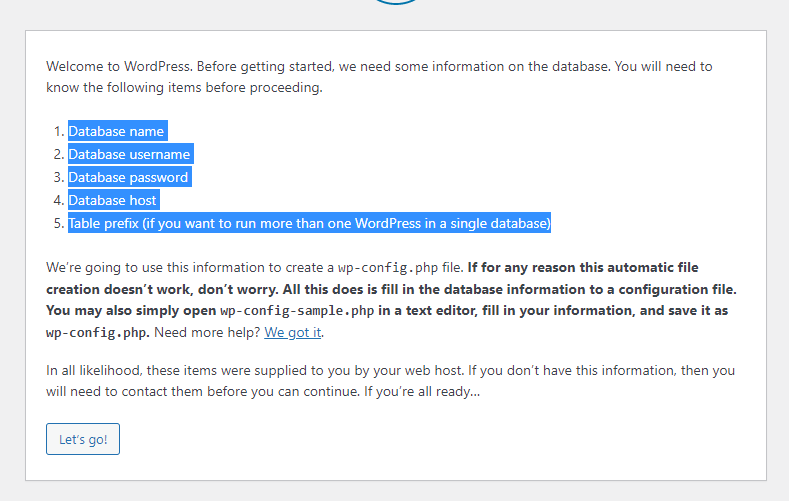
You will then be brought to an information screen that details everything you will need to install WordPress. Let’s go ahead and proceed; you’ll be sent to the database configuration page after that:
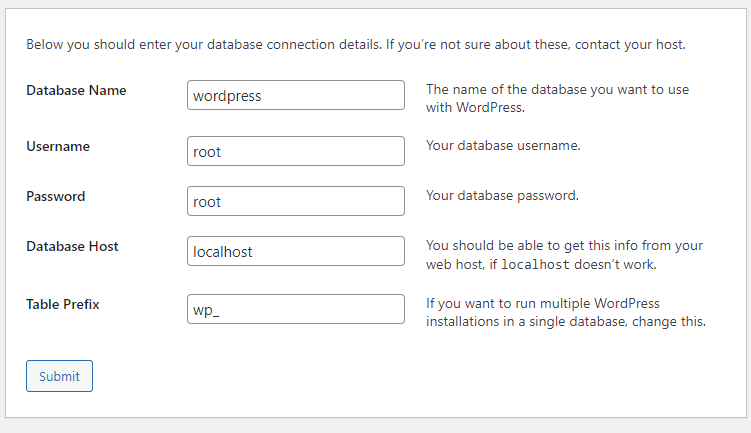
Here you must input the database name, which I called WordPress, the username, root, and the password, which is blank. Leave the database host and table prefix alone. When you’re finished, click Submit. If all of the information was entered correctly and there were no mistakes, you should get a message indicating that WordPress can interact with the database. To begin, click the Run the Install option.
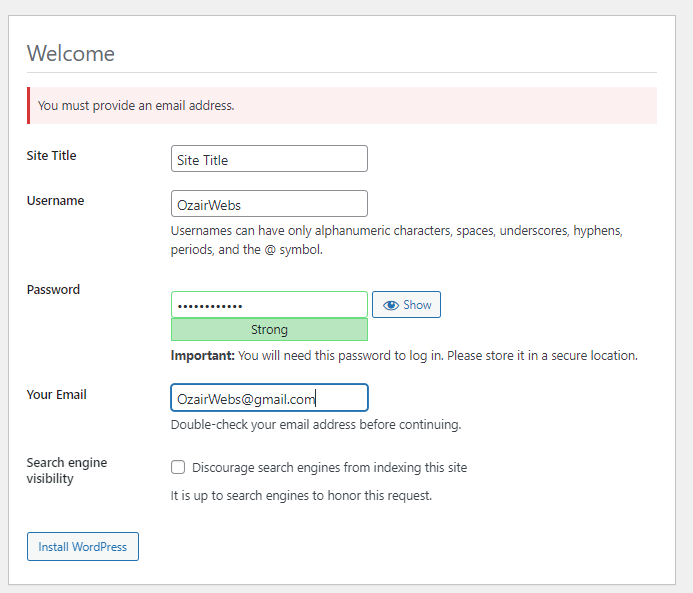
The next screen is where you provide the site information, an admin password, and your email address:
Again, while the site is down, it’s best to leave the Allow search engines to index this site box unchecked. When you’re finished, click Install WordPress to finish installing WordPress:
Hurrah! WordPress is now installed, and you can access the admin panel and view the front-end of the site by going to http://localhost/wordpress.

Final Verdicts
I hope this step-by-step instruction has assisted you in installing WordPress locally on your Windows machine. Both of these open-source apps are excellent for installing WordPress locally on your Windows system, and you may install as many copies of WordPress as you like.
In response to the question, ‘Which is better?’ This is mainly a matter of personal choice, as there isn’t much to choose between the two programs. XAMPP is more portable since it can be installed on different systems. Personally, I prefer XAMPP because it runs quicker and is easier to use than WAMP. WAMP, on the other hand, is a popular alternative with thousands of users.
Must read: Best WordPress SEO Plugin 2022 for better ranking